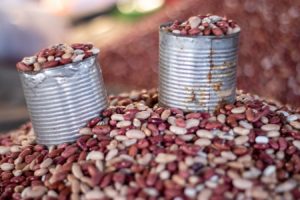
A lot of my clients feel that cooking beans from scratch is super intimidating and I hear you. Buying that dried bag of beans for like $2 feels awesome but then it just sits there in the pantry looking all judgy and dangerous. Stories of raw or under-cooked beans causing nausea, vomiting and diarrhea make you think twice about whipping up a little vegetarian dish.
Then there’s all the conflicting info on the web about how to prepare them! There are bloggers who say skip the soak and just use your instant pot, others that say soak for DAYS….yikes…it’s a lot to navigate!
I love all legumes and believe that beans are an excellent addition to your diet if they are prepared correctly. Check out this post for a couple of ideas on how to use those beans in a nutrient dense, quick & easy way.
Let’s talk about why we soak and how.
Why soak beans?
Soaking dried beans in water for 12-24 hours helps to neutralize phytic acid as well as reduce lectins.
Phytic acid and lectins are sometimes referred to as anti-nutrients. In large quantities they can impair your bodies ability to absorb nutrients.
The main concern with phytic acid is that it can bind to the minerals iron, zinc, calcium and manganese before your body can absorb them and they end up being excreted in waste. However, we can’t just skip foods that have that phytic acid in them because those are the types of foods that also have lots of anti-inflammatory and antioxidant properties that our bodies need.
Lectins are proteins abundant in uncooked beans and grains and are thought to be a defense mechanism for the plants which deters bugs and animals from eating them. Your body is unable to digest the raw form of foods with lectins so they pass through unchanged (nice mental image right?). Having adequate stomach acid and a healthy gut (check out my microbiome class) in addition to soaking and cooking these foods helps break down the lectins.
I like to soak my beans with a little acid (lemon with the rind or apple cider vinegar) which really helps reduce the bloat and nuetralize these anti-nutrients! This is as simple as dumping a pound of beans into a large bowl, covering them with clean water, squeezing in the juice of a lemon and tossing the rind in on top. I often do this in the evening so they are ready to go the next day!
Cooking your soaked beans.
Most beans take 45 minutes – 2 hours. You will know they are done if they easily mash in your mouth.
- Drain off the soaking water.
- Place beans in a large pot.
- Cover with fresh water.
- Bonus: add one strip of kombu seaweed (a nutritional powerhouse–chock full of vitamins and minerals).
- Extra Bonus: there is some buzz that pressure cooking those beans after soaking can destroy lectins / phytates even more!
- Don’t add salt or acids (such as tomatoes) during cooking as this can inhibit them from cooking properly.
- Add salt and acids to beans after they are fully cooked and simmer for an extra 20-30 minutes for the flavors to come together.
I ain’t got time for this you say!
Good news: canned beans are one of my favorites when it comes to foods that you can buy in a can.
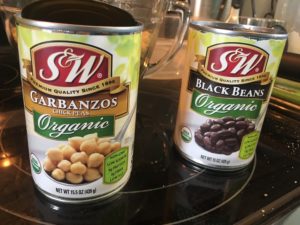
What to look for in canned beans…
Check those labels! BPA free cans are super awesome and buying organic will only add a few extra cents!
Ingredients: Prepared Beans, water, sea salt = #winner
I am not a fan of disodium EDTA. EDTA is a chemical salt that is used to prevent color loss. It has been associated with digestive distress, as well as the absorption rate of oral calcium.
Just remember to rinse canned beans until the bubbles stop to remove the phytic acid that has leeched into the liquid and you are good to go!
For more help and inspiration with family nutrition check out our family wellness course.

Pingback: Eating healthy with fewer grocery trips – Nielsen Integrative Nutrition LLC